This article, Data Steward Agent Setup, provides an overview of the configuration setup for Agentforce and the clearMDM Data Steward Agent.
Firstly, clearMDM v9.53 or above needs to be installed. You can do this through the Salesforce AppExchange Listing, or by installing the latest version from the Release Notes, or by contacting us directly at support@clearmdm.com.
Once you have clearMDM installed (or a version above 9.53), you can then install the Data Steward Agent. This again can be done either through the Saleforce AgentExchange Listing, or by contacting us directly.
When you have both installed, follow these setup instructions:
- Within Setup, open Einstein, Einstein Setup and select On.
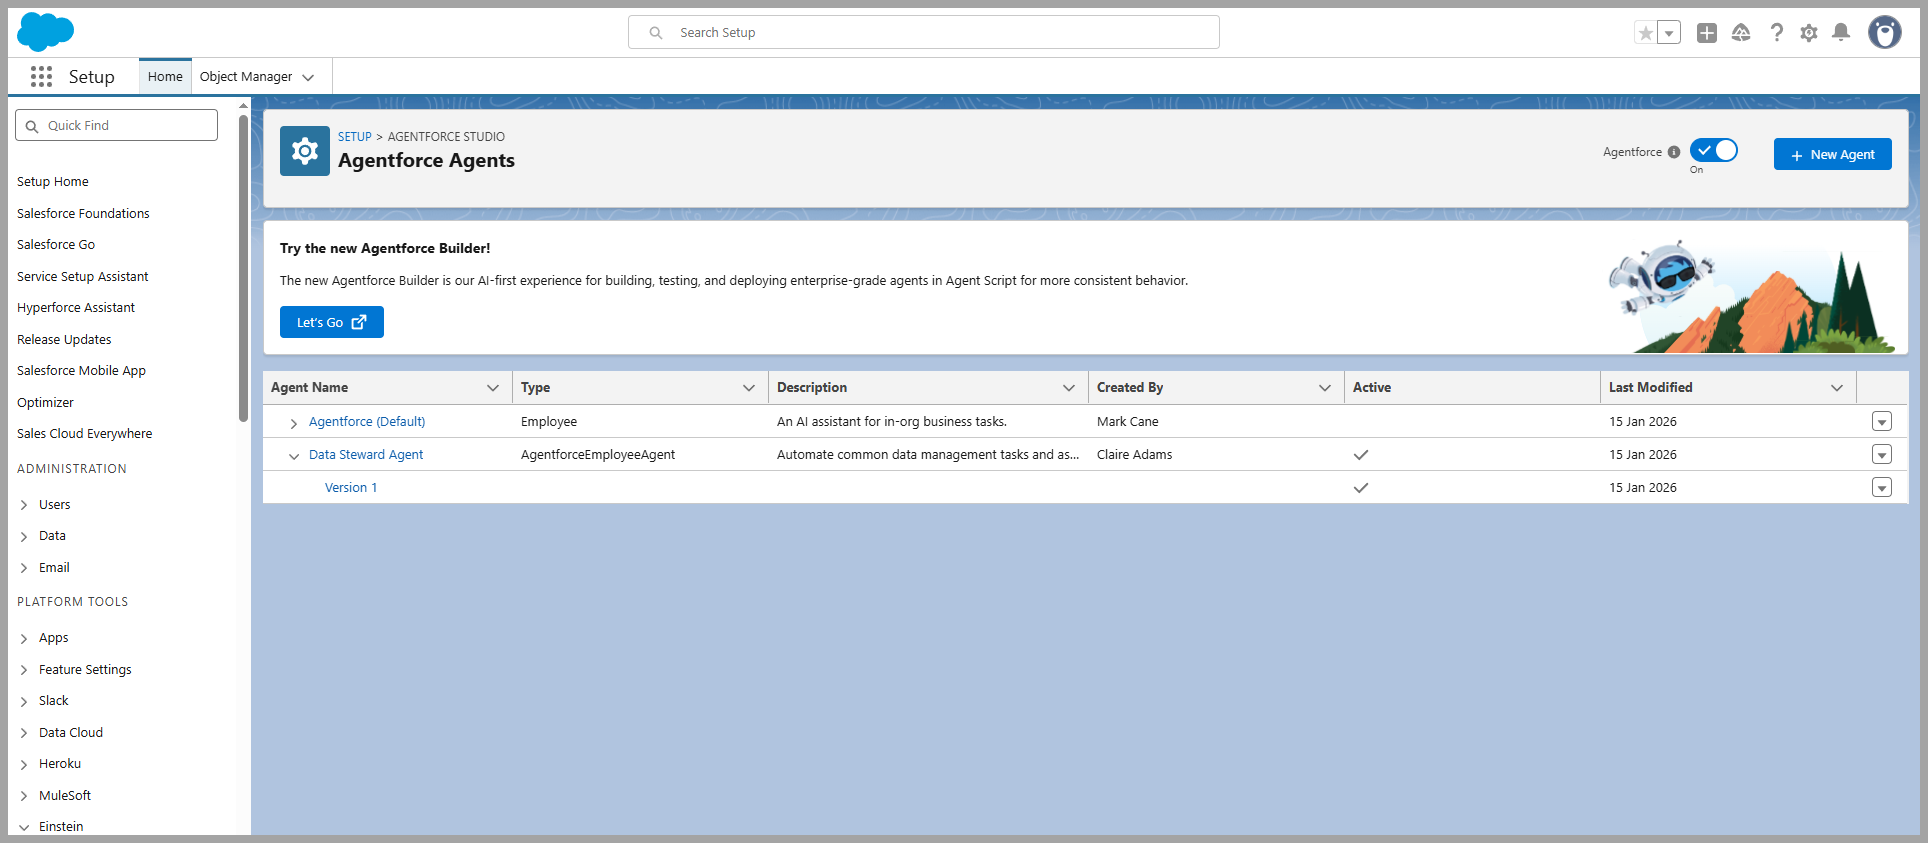
- Next, go to Agentforce Studio>Agentforce Agents and select On.
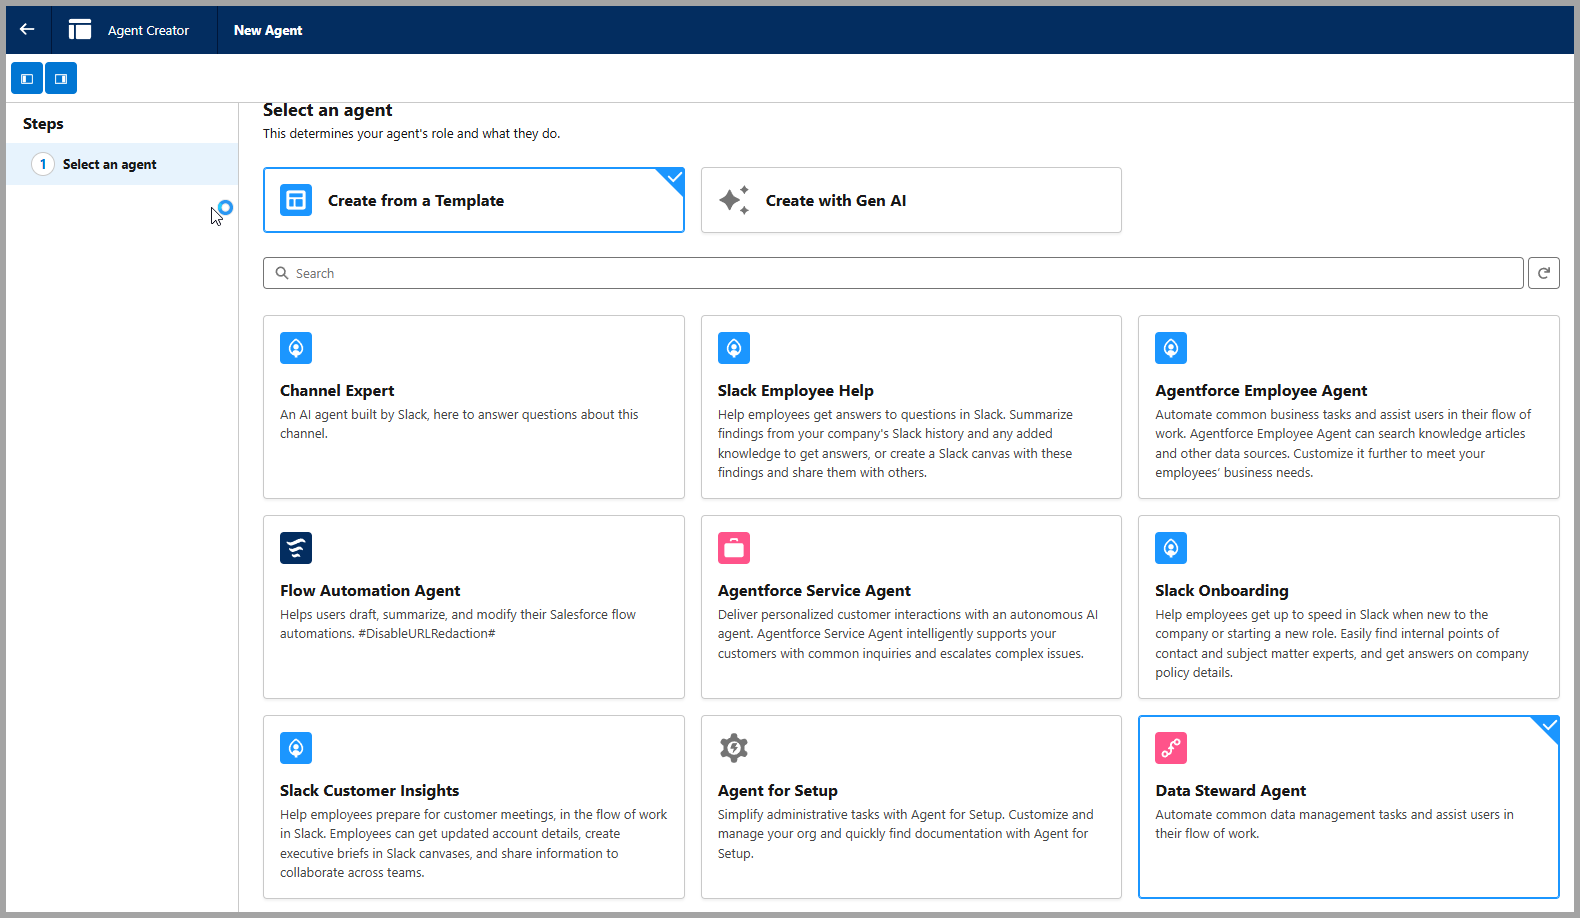
- Select the New Agent button.
- Select Data Steward Agent. (Screenshot below).
- Select Next.
- Select each Step and follow the Instructions.
- Select Next and Activate the Agent. (Screenshow below).
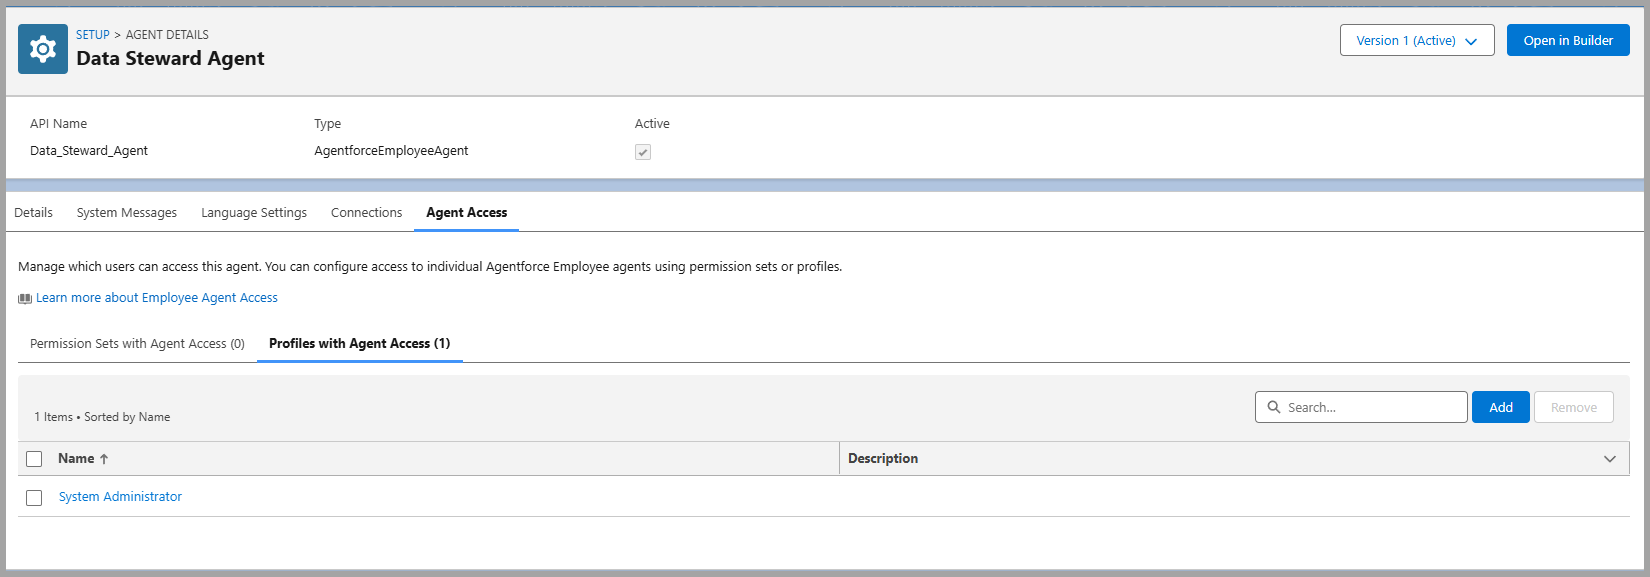
- To provide access to the clearMDM Agent, select the Agent and Edit (dropdown right hand side).
- Select the Agent Access tab and add the Profiles with Agent Access (e.g. System Admnistrator).
- Go back to Setup and Users and assign the permission sets ‘MDM Data Steward and ‘Agentforce Default Admin‘.
The following Training Articles provide further information on the Data Steward Agent capabilities.
There are also Blog Posts available discussing the Data Steward Agent in further detail.
If you would like further information, a demo, or indeed would like help with setting the clearMDM Data Steward Agent up, please do not hesitate to contact us at support@clearmdm.com.
Article Last Reviewed: 2026-04-23